Archive
Listing all scopes in a Workflow Manager instance using PowerShell
One of the pains I have encountered with setting up the Workflow Manager for use with SharePoint is that there is no clear visibility into the scopes that are currently on the Workflow Manager farm. It was hard to understand what scopes were already created, which of those were active, what the parent-child hierarchical relationships among those were and what applications were connected to those scopes.
So I tried to figure out if there was a way through OM code to get to this information or at least as much of it as I can get to without spending a whole lot of time and research. And below is what I could whip up.
param([parameter(mandatory=$true)][string]$Endpoint, [string]$Path = "/", [string]$Parent = "None")

[Reflection.Assembly]::Load("Microsoft.Workflow.Client, Version=1.0.0.0, Culture=neutral, PublicKeyToken=31bf3856ad364e35") | Out-Null
Write-Output ""

function WriteScopeInfo([string]$scopeUri, [string]$path, [string]$parent) {
    $scopePath = $scopeUri + $path
    $client = New-Object -TypeName "Microsoft.Workflow.Client.WorkflowManagementClient" -ArgumentList $scopePath
    $manager = $client.CurrentScope
    $scope = $manager.Get()

    Write-Output "Name: `t`t`t$($scope.DisplayName)"
    Write-Output "Path: `t`t`t$($scope.Path)"
    Write-Output "Status: `t`t$($scope.Status.ToString())"
    Write-Output "User Comments: `t$($scope.UserComments)"
    Write-Output "Parent: `t`t$parent"
    Write-Output "Children: `t`t$($scope.ChildScopeCount)"
    Write-Output ""

    if ($scope.ChildScopeCount -gt 0) {
        $manager.GetChildScopes() | % { WriteScopeInfo $scopeUri $_.Path $scope.Path }
    }
}

WriteScopeInfo $Endpoint $Path $Parent
Note that the script requires 3 inputs, one of which is mandatory. The Endpoint parameter requires the URL to the workflow endpoint. This will likely be a web application on port 12290 or 12291 depending on whether you set up the Workflow Manager farm to just use HTTPS (which is the default) or also HTTP. Please refer to this post if you are not sure how to set up the Workflow Manager farm.
The other two parameters are just used to kick things off for the scope discovery function. The first called Path is used to determine the node in the scope tree that you want to begin with. By default, this assumes the value “/” representing the root scope on the farm. But if I know of another scope somewhere down the tree and the branches and spring thenceforth are the only ones I am concerned with, I would pass it so – “/myscope/subscope”. The second called Parent is only required to identify the parent of the scope node that I am starting at. It is not really required and assumes the value “None” by default.
When run the script produces an output as shown below. As you can see, I am providing the endpoint URL of the Workflow Manager instance installed on my machine.
For those that are unable to use PowerShell, here is the C# version of the same thing.
using System;
using System.Collections.Generic;
using System.Collections.ObjectModel;
using System.Configuration;
using System.Linq;
using System.Text;
using System.Threading.Tasks;
using Microsoft.Workflow.Client;

namespace WorkflowClient
{
    class Program
    {
        static void Main(string[] args)
        {
            try
            {
                string workflowEndpoint = string.Empty;
                if (args.Length < 1)
                {
                    Console.Write("Provide workflow endpoint URL: ");
                    workflowEndpoint = Console.ReadLine();
                }
                else
                {
                    workflowEndpoint = args[0];
                }
                Console.WriteLine("");
                WriteScopeInfo(workflowEndpoint, "/", "None");
            }
            catch (Exception ex)
            {
                Console.WriteLine(ex.Message + ex.StackTrace);
            }
            finally
            {
                Console.WriteLine("Press any key to end...");
                Console.ReadKey(true);
            }
        }

        private static void WriteScopeInfo(string scopeUri, string path, string parent)
        {
            try
            {
                WorkflowManagementClient client = new WorkflowManagementClient(scopeUri + path);
                ScopeManager manager = client.CurrentScope;
                ScopeDescription scope = manager.Get();

                Console.WriteLine("Name: " + scope.DisplayName);
                Console.WriteLine("Path: " + scope.Path);
                Console.WriteLine("Status: " + scope.Status.ToString());
                Console.WriteLine("User Comments: " + scope.UserComments);
                Console.WriteLine("Parent: " + parent);
                Console.WriteLine("Children: " + scope.ChildScopeCount.ToString());
                Console.WriteLine("");

                if (scope.ChildScopeCount > 0)
                {
                    Collection<ScopeDescription> children = manager.GetChildScopes();
                    foreach (ScopeDescription child in children)
                    {
                        WriteScopeInfo(scopeUri, child.Path, scope.Path);
                    }
                }
            }
            catch (Exception ex)
            {
                Console.WriteLine(ex.Message + ex.StackTrace);
            }
        }
    }
}
I hope to be able to use this to keep things clean/sane when I have more applications using my workflow farm and needing more scopes and child scopes.
Installing Workflow Manager 1.0
This post covers the installation of a new Workflow Manager 1.0 farm. For this installation, we are choosing to use an existing SharePoint 2013 farm. The intent is to have the SharePoint farm configured to leverage Workflow Manager to enable the SharePoint 2013 workflow platform. It is not required that you install a workflow farm on a SharePoint farm. Workflow Manager 1.0 can be installed on its own server farm and SharePoint 2013 can be setup to communicate with it over the standard service endpoints.
Planning
Before installing the Workflow Manager and Service Bus components on a new environment, it will help greatly to plan a few things out and have them ready for when the installation and configuration of the product will commence.
The following documentation has been captured from an installation on a single server SharePoint 2013 farm but if you are installing on a larger farm, it may be advisable to install the product on more than one server and add them to the farm that is created through the configuration process after the installation on the first server. This ensures the workflow services are highly available and are not prone to a single point of failure.
Prerequisites
To prepare for the installation of workflow manager, check for the pre-requisites where installing.
The following are the pre-requisites to install Workflow Manager 1.0
- .NET Framework 4 Platform Update 3 or .NET Framework 4.5
- Service Bus 1.0
- Workflow Client 1.0
- PowerShell 3.0
The following are the pre-requisites to configure Workflow Manager 1.0
- Instance of SQL Server 2008 R2 SP1, SQL Server Express 2008 R2 SP1, or SQL Server 2012.
- TCP/IP connections or named pipes must be configured in SQL Server.
- Windows Firewall must be enabled. [Windows Firewall is Off on target server]
- Ports 12290 and 12291 must be available.
Supported platforms
Check for supported platforms. The below represents the platforms on which installation will be attempted and the confirmation that they are supported.
- Windows Server 2012 x64 Standard and Enterprise are supported
- SQL Server 2012 with Default Collation and Windows Authentication is supported
The installation will be performed using an account that is a domain account on the domain the SharePoint 2013 farm servers are joined to and also a local administrator on the machine.
Runas Account
The Workflow Manager and Service Bus components of the Workflow solution will both expose a service endpoint that clients can connect to. The service will need a domain account to run as. The service account spdev\spsvcs which corresponds with the SharePoint Managed Account for SharePoint services will be used as the RunAs account for Workflow Manager. This account will automatically be granted Logon as a service privilege during configuration.
Database names
The Workflow Manager and Service Bus components of the solution will each create three databases that they can work with. If you have naming conventions for databases or need to do some general cleanup of names for better future understanding, this is the time to do it. Here are the names that I am going with.
Workflow Manager databases
- WFManagement
- WFInstanceManagement
- WFResourceManagement
Service Bus databases
- SBManagement
- SBGateway
- SBMessageContainer01
Installing
The product can be installed directly through the Web Platform Installer on a machine that is connected to the Internet. However, the installation on the target SharePoint 2013 farm that I am attempting will be done in Offline mode based on the instructions provided here.
Download the Web Platform Installer
On a machine connected to the Internet – to be referred to as the source machine – access this location and download the installer file for the Web Platform Installer. Once downloaded, run the MSI and the Web Platform Installer should be installed to %ProgramFiles%\Microsoft\Web Platform Installer.
Launch a new command prompt as administrator and run the following command
webpicmd /offline /Products:WorkflowManager /Path:C:\WorkflowManagerFiles
The required files will be copied down to the location indicated.
If the specified directory doesn’t exist, it gets created during the download process and the required files should now be available there if the process was successful as indicated below.
The next step is to copy these files over to the target machine.
Once the files are copied to the target server, launch an elevated command prompt and navigate to the bin folder contained within the Workflow Manager files folder used. This location will contain the Web Platform Installer executable that can be run in offline mode. Run the following command
WebpiCmd.exe /Install /Products:WorkflowManager
/XML:C:/WorkflowManagerFiles/feeds/latest/webproductlist.xml
NOTE: The command provided in the TechNet article referenced above does not work with the list of files available through the download. Run the command as provided here.
Once the files required are identified, the EULA for the files is presented. Type ‘Y’ and press Enter to proceed.
Once the installation is done, the following messages is what you should see unless there was an error somewhere.
Also, the Workflow Configuration tool is launched as shown below
This article focused on the planning and installation of the Workflow Manager product in offline mode on a target SharePoint 2013 environment. Check out how to Configure Workflow Manager 1.0 to continue.
Configuring Workflow Manager 1.0
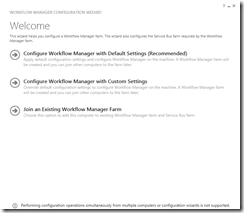
If you have installed Workflow Manager 1.0 and everything went through successfully, at the end of the installation process, you should be presented with a configuration screen that will allow you to create a new Workflow Manager farm with default or custom settings OR join the computer on which you just installed Workflow Manager to an existing farm. To review the installation process, check out Installing Workflow Manager 1.0.
This article covers the configuration process using the Configuration wizard UI. If you are interested in running configuration through the Workflow Manager PowerShell console, refer to this post.
Before you proceed, ensure that the account that you are logged in as to configure Workflow Manager has sysadmin role on the instance of SQL Server where the Workflow Manager and Service Bus databases will be created. Configuration will be performed according to the steps outlined here.
Choose the option on the Configuration Wizard to install Workflow Manager with Custom Settings
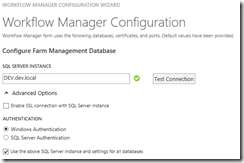
On the following screen, for SQL Server Instance, choose the options as shown below and click Test Connection. If the connection is successful, a green check mark icon should be seen. Expand the Advance Options section and ensure Windows Authentication is selected and that the option to Use the above SQL Server Instance and settings for all databases is checked. We shall not use SSL for this particular installation.
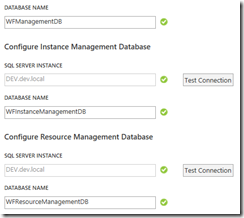
Provide database names as shown below (I am using default names here) for the workflow, instance and resource management databases. Clicking on the Test Connection button each time will allow ensuring that the database names are not already used.
Scroll down to configure the service account that will be used to run the Workflow Manager and Service Bus services. Provide inputs as shown below.
This installation procedure allows Workflow Manager to generate its own certificates. Provide the Certificate Generation Key and retype it to confirm as shown below.
In the port configuration section, leave the default port selections for HTTPS and HTTP. Check the box to allow communication over HTTP. NOTE: This is being done as part of the current installation process since this is a non-Production environment. It is not recommended per the TechNet article to allow workflow management over HTTP in a Production environment. Uncheck the Enable firewall rules on this computer checkbox.
Next, specify the group that will be given access to all Workflow Manager databases. I am using the local admin group; on a full-fledged farm, a group with all farm administrators would make sense. Then click on the Next button to proceed to Service Bus Configuration.
On the Service Bus Configuration page, set the database names again as shown below. These are not the default names here, by the way. I did some clean up to have the names look consistent and remove the monikers “DB” or “Database” from them since that part is evident.
For the service account and certificate key, choose the same ones that were provided for the Workflow Manager configuration
For the port configurations, leave in place all the default port numbers. Uncheck the Enable firewall rules on this computer box.
NOTE: The firewall rules checkbox has been unchecked for both the Workflow Manager and the Service Bus because checking this box will cause the configuration wizard to try and edit the firewall rules on the computer. However, the firewall on the target server is set to Off. The setting made above is to skip the firewall rule setting. If the firewall, is turned back on, rules will need to be put in for each of the ports configured above. Otherwise, the workflow manager and service bus services may not respond correctly.
Finally, configure the admin group that will receive access to all Service Bus databases as shown below and click on the Next button to proceed.
The next screen provides a summary of all of the settings and selections made. Go through them to ensure that the right selections have been made for Workflow Manager.
Scroll down to view the settings and selections for the Service Bus as well. Once satisfied with all the settings made, click on the Check button at the bottom of the screen to proceed.
NOTE: You can copy a text manifest of all the settings made by using the Copy link at the bottom of the page. You can also, use the Get PowerShell Commands link to get the complete configuration process given out in script that you can quit the wizard and execute through the Workflow Manager PowerShell console to complete configuration. If you prefer using PowerShell, copy the commands now and refer to this article.
If you choose to carry on in the wizard, at this point the configuration process kicks off and goes through with the farm provisioning. If all goes well and configuration is successfully completed, the UI will display check marks against all stages and we may then proceed on to the step where SharePoint is configured to leverage Workflow Manager services.
If you have everything set up correctly, you should be able successfully add the Service Bus and Workflow Management farms and add the host to both. However, sometimes, a problem might occur during configuration that will require fixing before configuration can be run again. To check the workarounds or solutions to a couple of problems that I have faced and documented, refer here.
If everything got configured correctly, the Workflow farm should be ready to be consumed by clients such as SharePoint 2013. To learn how to configure SharePoint 2013 to consume the workflow services, please check out Configuring SharePoint 2013 to use Workflow Manager 1.0.
Configuring Workflow Manager 1.0 using PowerShell
This post covers the process of configuring Workflow Manager 1.0 using PowerShell. It assumes that Workflow Manager 1.0 has already been installed. To get the step by step on the installation procedure, check this article. In Configuring Workflow Manager 1.0, I have detailed the post installation configuration process of the Workflow Manager product through the Configuration Wizard UI. If however, you like me, are the kind of person that would like to monitor as many steps along the process as you can, you may want to run configuration through PowerShell. Note that while you can follow the commands purely as shown in this article, and make required changes for your environment, it would be easier to refer to the configuration post and use the wizard to make all the settings but not run it. Instead, at the end of that article, you can see how the PowerShell commands based on the settings made are handed to you by the wizard so you can copy them, close out the wizard and move on to the console.
You can run the entire configuration process through a script that the configuration wizard provides you as mentioned above. All you need to do to generate this script is use the Get PowerShell Commands link on the Summary page. There are a couple of good reasons for using PowerShell instead of the wizard based configuration process
- You can run each command, verify the outcome and move on to the next step confidently.
- Error handling becomes easier since it is very evident what specific operation failed and you can resume after the last successful step.
If you have already copied, the PowerShell commands provided by the configuration wizard, you may have to or want to make some changes to it before you proceed. The following are the changes I made.
- If you open the commands, you will notice that text at the places where the RunAs account password or the certificate generation key are used have been replaced with some placeholder text (which looks like this – ‘
***** Replace with Workflow Manager Certificate Auto-generation key *****’) so as not expose those. This will need to be corrected. - The script instantiates a couple of references to hold the certificate generation key – $WFCertAutoGenerationKey and $SBCertificateAutoGenerationKey. These are used in the
New-SBFarm,New-WFFarm,Add-WFHostandAdd-SBHostcommands to follow. It does this because this allows using different certificate auto-generation keys for each service. If you wish to use the same certificate, you can eliminate one of these statements and make sure you use the variable from the other in both commands. - The same as above holds true for the RunAsPassword. One of these can be removed and the variable from the other statement can be used in both the
Add-SBHostandAdd-WFHostcommands. - Once all of this is done, you may choose to save the script as a PS1 file and run the entire set of commands at once through the console or type each command individually.
To start configuration, launch a new Workflow Manager PowerShell console. You should find a shortcut to this in the Workflow Manager 1.0 program folder in the Start menu. If not, you could navigate to %ProgramFiles%\Workflow Manager\1.0\Scripts and run StartWFConsole.cmd. Either way, you’ll end up launching Windows PowerShell with the WorkflowManager module imported.
STEP 1 – Get a secured string for the Certificate Generation Key
STEP 2 – Create a new Service Bus farm
In progress…
… and done.
STEP 3 – Create a new Workflow Management farm
In progress…
… and done.
STEP 4 – Get secure string for the super-secret password
STEP 5 – Add this host to the service bus farm
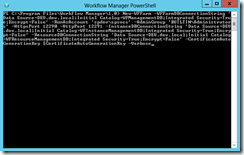
In progress. The part where the service bus services are started may take a while. This is where the Service Bus Gateway and the Service Bus Message Broker are being spun up. This is also the most troublesome part of the entire configuration process.
And done.
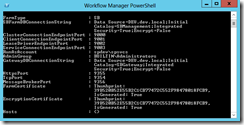
The farm information now looks as shown below
If you face any challenges with the addition of the host to the service bus farm, please check this post to see if you are having a problem similar to the ones documented. If everything went alright, you can proceed on to the next step.
STEP 6 – Create a namespace on the Service Bus to be used by Workflow Manager. Couple of things to note here.
First, you can call this namespace anything as long as you ensure you use the same name in the client configuration parameter you use when adding the host to the Workflow Manager farm.
Second, if you copied the configuration PowerShell from the wizard, it does some exception handling and implements a wait after the New-SBNamespace cmdlet is called presumably to allow the time it takes for the instantiation to complete before we proceed on to getting a client configuration based on it. I am not doing any of this below because I am running each command in sequence and can manually handle these things.
STEP 7 – Get a client configuration for the namespace just created. This provides you an XML structure that can be used by the Workflow Manager client to establish connections and communicate with the Service Bus.
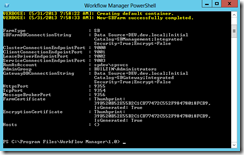
STEP 8 – Finally, add the current host to the Workflow Manager farm. This usually goes through without a hitch and completes the configuration. At least on the Workflow Manager.
So you see a couple of HTTPS and HTTP endpoints. Let’s take a quick look at IIS Manager to see if these show up correctly. As you can see below, there is now a Workflow Management site on IIS that is bound to port 12290 for SSL and 12291 for HTTP based communication.
One final piece of verification is to hit up the workflow endpoint over HTTP in a browser. And everything looks good.
If you’ve gotten this far, you are done with the farm creation process and the addition of the host to the farms. The Workflow Manager farm should be online and humming merrily at this point. But if your original intent for the farm was to lend its cool new features to SharePoint 2013, check out how to Configure SharePoint 2013 to use Workflow Manager 1.0 services.
Troubleshooting configuration problems with Workflow Manager and Service Bus
This post covers some of the problems I have encountered during the configuration of the Service Bus for use by Workflow Manager which was being setup to be used by SharePoint 2013. For step by step guidance leading up to the steps described below, refer to Installing Workflow Manager 1.0 and Configuring Workflow Manager 1.0.
Problem
A failure occurs after the creation of the Service Bus and Workflow Manager farms is completed, as the host is being added to the service bus farm. The failure occurs with the following error message: None of the declared nodes is for the current machine. This is pictured in the screenshot below from running configuration through the UI but the same message is displayed even when using PowerShell in the console.
Solution
Every time this happened to me, I was able to work around it by checking the hosts file on the machine on which installation is being performed. If there are any loopback entries to a localhost IP in the hosts file, comment or remove them temporarily and retry configuration.
Problem
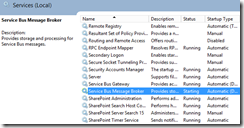
On occasion, the Service Bus Message Broker service gets stuck in a perpetual “Starting” state.
And eventually times out
Look in the event viewer and you should be able to see what may have failed. Not that it always helps you but it may. In this case, it looks like the Messaging Broker is waiting for the Fabric service.
And looking further up the list, it looked like the Fabric was having its own problems.
The fabric host service was running fine
Solution
Stopped and started this service and this had the effect of restarting the Service Bus Message Broker and it went into the running state. I have found from running service bus configuration on various different environments that the fixes for these issues are neither consistent nor predictable. I have had to try several things before I could make it work and the solution is not always the same. That said, in general stopping and starting the services seems to help when the Service Bus Message Broker is started last in sequence.
That’s fixed now but what is the status of the service bus host configuration? You can always figure this out by using the Get-SBFarm cmdlet. As you can see below, the host has been added but the configuration state is HostConfigurationStarted. It should read HostConfigurationCompleted if it was all done.
A look at the registry shows that everything seems to be configured alright except the host configuration value is set to Started.
So I tried removing the host from the farm to try and re-add it.
As you can see below, the host is gone
And the Service Bus services too.
Now to try and add the host again
And done. As you can see, the steps it did not get to complete the last time because the Service Bus services failed to start correctly were just to restart the SB farm and update the registry.
The farm information now looks as shown below
The registry doesn’t look very different except for the indication that the host configuration is Completed. Technically, it may have all worked after restoration of Service Bus services above unless there was something referencing the registry to check if the host was properly added. But it is always so much better to get it done cleanly.
For good measure, a couple of quick additional tests before we move on.
The above checks show that the services are up and running and the farm is connected to an active message container. In other words, it is ready to go.
Problem
Yet another problem that I have faced a couple of times is after configuration, on checking the status of the Workflow Manager farm, I found that certain services were responding with an HTTP 403 (Forbidden) error.
Solution
In my case, checking the connection settings on Internet Explorer revealed that a proxy was configured to be used on the errant machine. Upon removal of the proxy settings, the service endpoint came online and was shown in the Running state.
Please note that all of the above is based on what worked for me on my environment. Not a guarantee that it will solve similar issues in other environments but certainly worth checking if it applies. I may be adding updates to this article based on new information obtained on any of the problems stated here or new ones that I encounter.
Configuring SharePoint 2013 to use Workflow Manager 1.0
This article covers the final step in the process of setting up SharePoint 2013 for the new workflow platform for SharePoint 2013 workflows. This is where SharePoint is connected to Workflow Manager services.
This post assumes you have already installed the Workflow Manager product and configured the Workflow Manager and Service Bus farms using either the Configuration Wizard or through PowerShell. Here, we shall go ahead and set SharePoint up to use the Workflow farm. Based on whether SharePoint is collocated with the Workflow Manager and whether communication between SharePoint and Workflow Manager over HTTP is allowed, the steps through which this configuration is performed are different and are documented here. For the configuration in this instance we are using SharePoint on the same farm as Workflow Manager and communication over HTTP is allowed.
Configuration on SharePoint is about creating a service application proxy for workflow that has the service endpoint configuration for the Workflow service. This is done through the use of the Register-SPWorkflowService cmdlet in the SharePoint Management Shell. There is no UI based way of creating this proxy through the Central Administration application.
Before we proceed to do this however, let’s take a look at a few things. Here, I am using the Get-WFScope cmdlet to view the scope at the root of the workflow service endpoint. Note: In order to get scope details you’d need to know the ScopeUri of the scope you’re accessing. Without knowing what scopes are on the instance, it is hard to know or remember all the URIs. There is no way to list available scopes through existing cmdlets. Here’s a PowerShell script that helps with this.
When we create a Workflow Service Application proxy, we add a combination of a SharePoint site collection and the URI of the scope in the workflow service that it is bound to. Looking at the above, we see that there is just one root scope at this point with no child scopes.
Typically, there would not be a Workflow Service Application or proxy on a fresh new SharePoint environment. Because of whatever experimentation I was doing on my trial environment, I already did have a pair.
When I tried to check the proxy status
This is understandable since I have not made the connection with the workflow service yet. Just so I understood how this was set up, I ran the following from the SharePoint Management Shell.
Get-SPWorkflowServiceApplicationProxy | Format-List *
This didn’t tell me much – in fact it told me it was Online which it quite clearly was not and could not be. So I tried the following set of commands.
Both scope name and service address come up null. Again, since we have not made the connection with the workflow service yet. I have the option of deleting this proxy set up and starting afresh. Just to see how Register-SPWorkflowService would respond to the existence of the proxy, I went ahead without deleting it.
And it went through just fine. Or so it seems from the silent return on the command above. So let’s verify.
First, on refreshing the proxy management page on Central Administration.
Splendid. Now to check on the proxy settings.
Nice. You can see that a new scope called SharePoint has been created and its address has been bound to the proxy. Let’s hit up this URI in the browser for a second.
Very cool. There is obviously a lot more going on here than when we hit the root scope URI. One thing that pops out is how the security configuration type is OAuthS2SSecurityConfiguration. This is why we used the AllowOAuthHttp switch parameter when running Register-SPWorkflowService. But all that for a different discussion. Next, a quick look again at the root scope.
Now checking for the scope in question – the one called SharePoint that is apparently connected to the proxy on SharePoint.
How do we know this is linked to the proxy we were looking at? Notice the GUID in the UserComments property? Compare that with the Id property of the service application proxy that we got above from running Get-SPWorkflowServiceApplicationProxy. But to have the proof of the pudding, let’s go get the “after” picture on SharePoint Designer 2013.
The default platform choice now is SharePoint 2013 Workflow. This means our configuration went through fine and we are done.
Update [6/20/2013]: Sometimes it has been found after all configuration has been completed that the platform selection doesn’t show up in SharePoint Designer 2013. If you have gone through all of the validation steps above to ensure that the connection has been made right, there’s no need to panic. Here are a couple of additional steps that help with troubleshooting…
1. If you are on a multi-server environment and you set up Workflow Manager on an app server, you have to remember that when you use SharePoint Designer, that works with your web server and therefore, in order to make a connection to the Workflow Manager end points, it will need the Workflow Manager client. Make sure you have installed Workflow Manager client on all of your farm servers.
2. Sometimes, it requires an IISReset on the server just to shake things up and get them connected properly. There are people who have reported not seeing the SharePoint 2013 Workflow option after configuration and come back the next day to find it magically appear. This is likely because their app pools got recycled overnight. Definitely worth a shot.


